

Super for WooCommerce
A seamless integration with WooCommerce.

Please note: the video above uses screenshots and recordings which feature our legacy branding. All instructions and processes remain the same.
WooCommerce is a SaaS solution used by businesses around the world to build their e-commerce stores. Businesses can easily build and manage their online stores and customise them to their needs.
Our Super Payments plugin enables WooCommerce businesses to accept free payments in a secure and hassle-free manner, whilst providing your customers with cash rewards and instant refunds on their purchases.
1. Add Your Cash Reward
Cash rewards are set per brand in the Business Portal and are optional. See Cash Rewards for how to choose a reward amount and expiry, or to turn rewards off.
2. Add Your WooCommerce Integration
Once you are signed up, go to Developers → Integrations in the Business Portal and select Create new integration to add your e-commerce store URL.
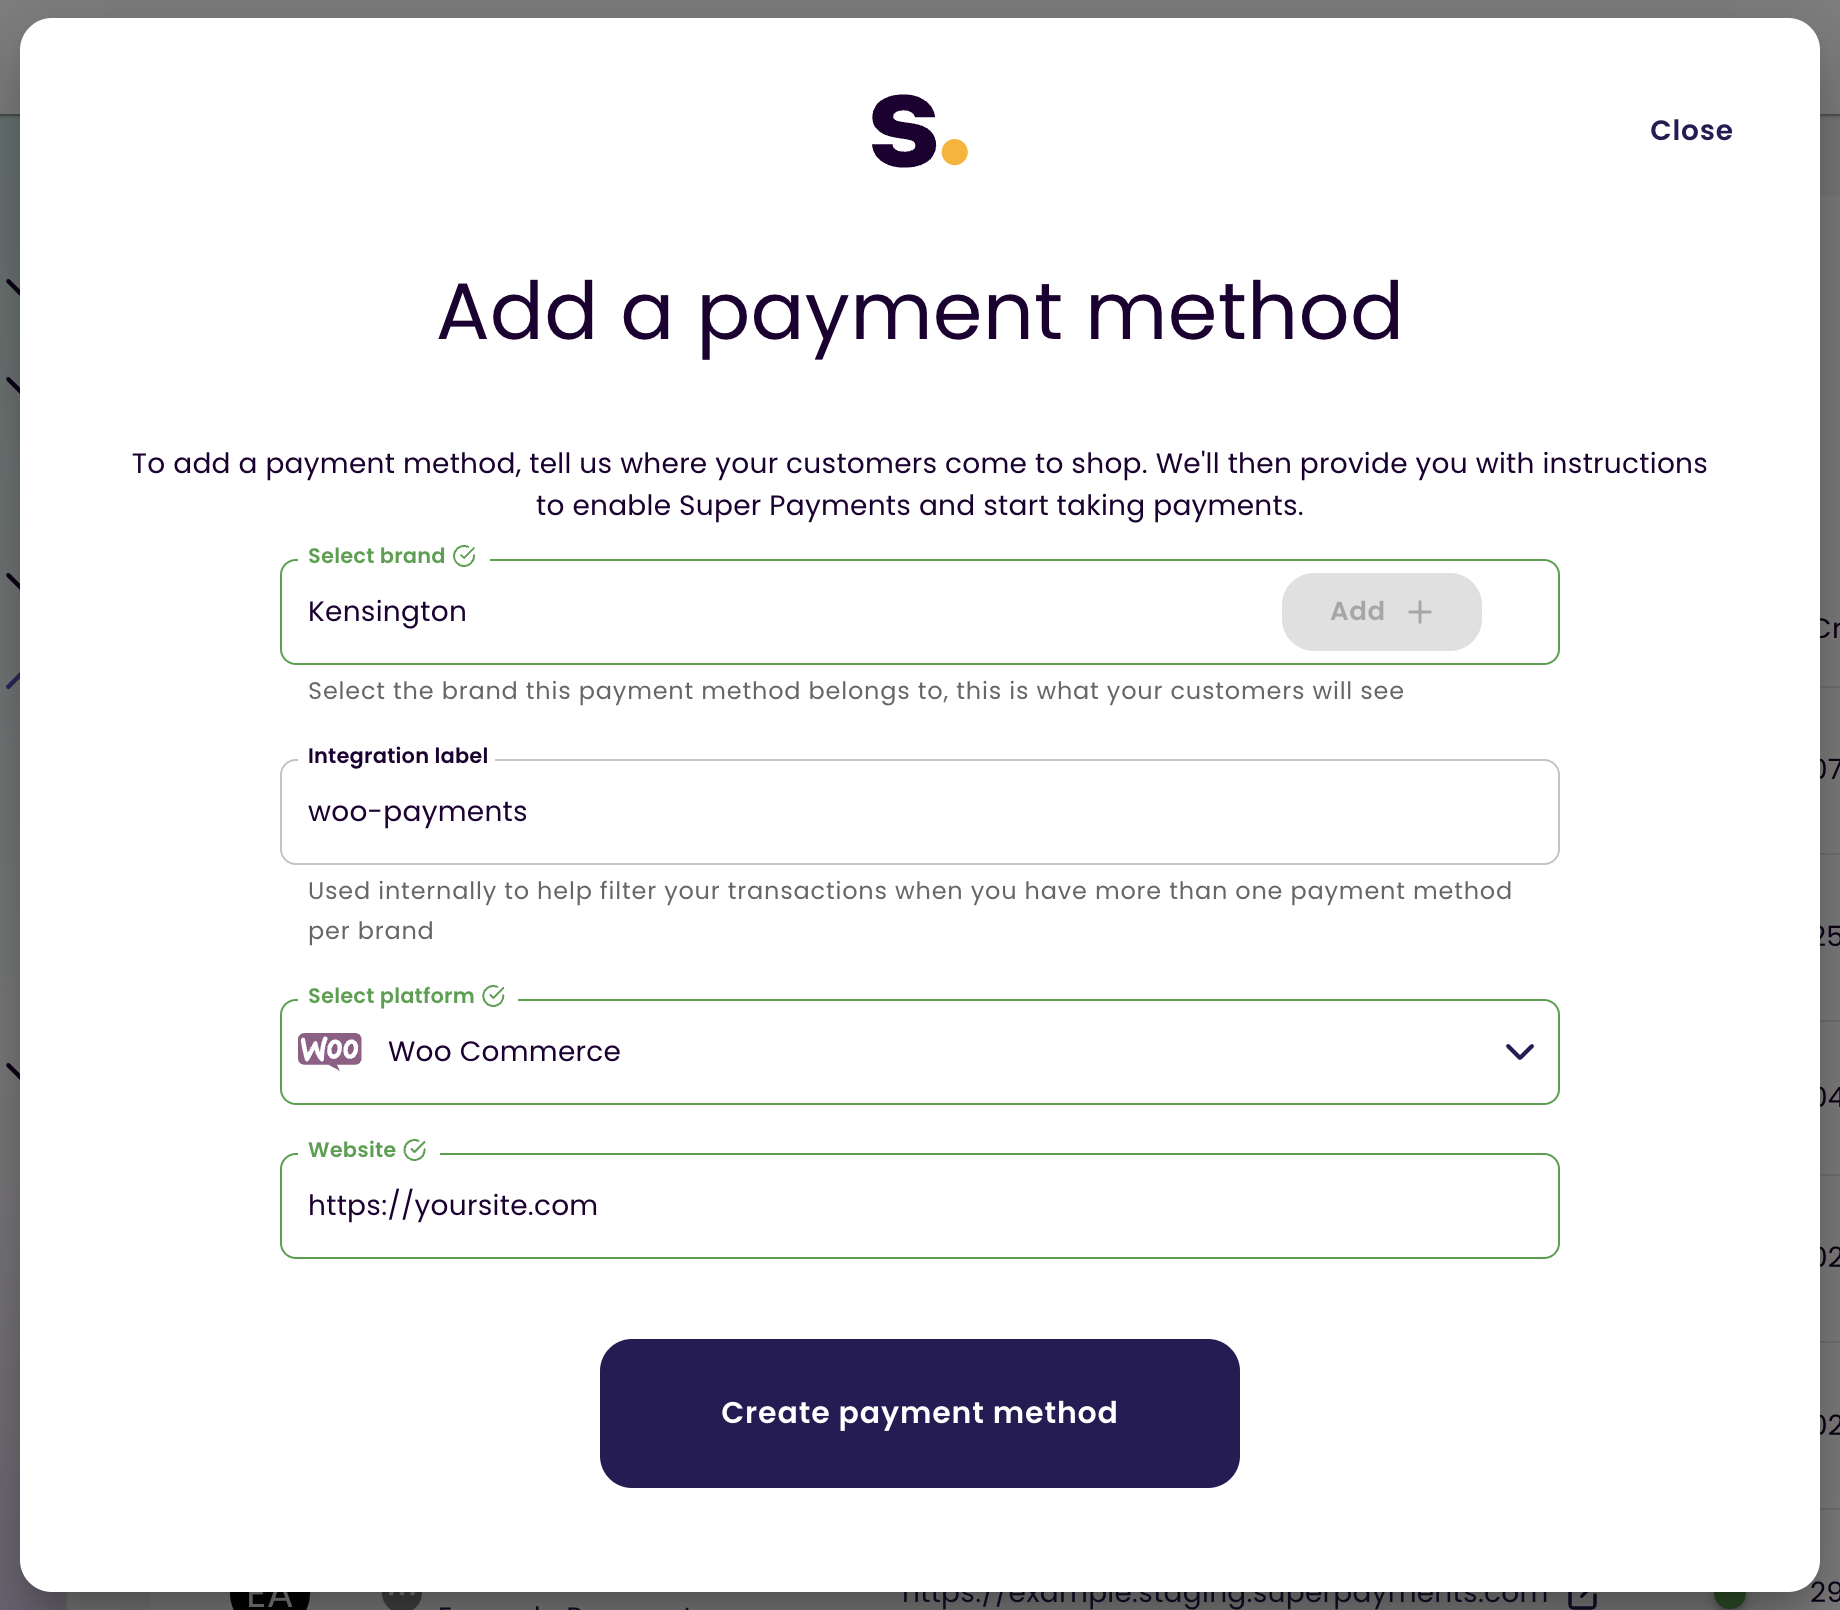
3. Generate Your WooCommerce Plugin API Keys
Generate your API keys in your Business Portal. You'll need your Confirmation ID and API key when you add your Super Payments plugin in the WooCommerce admin interface. These keys keep your payments safe and secure.
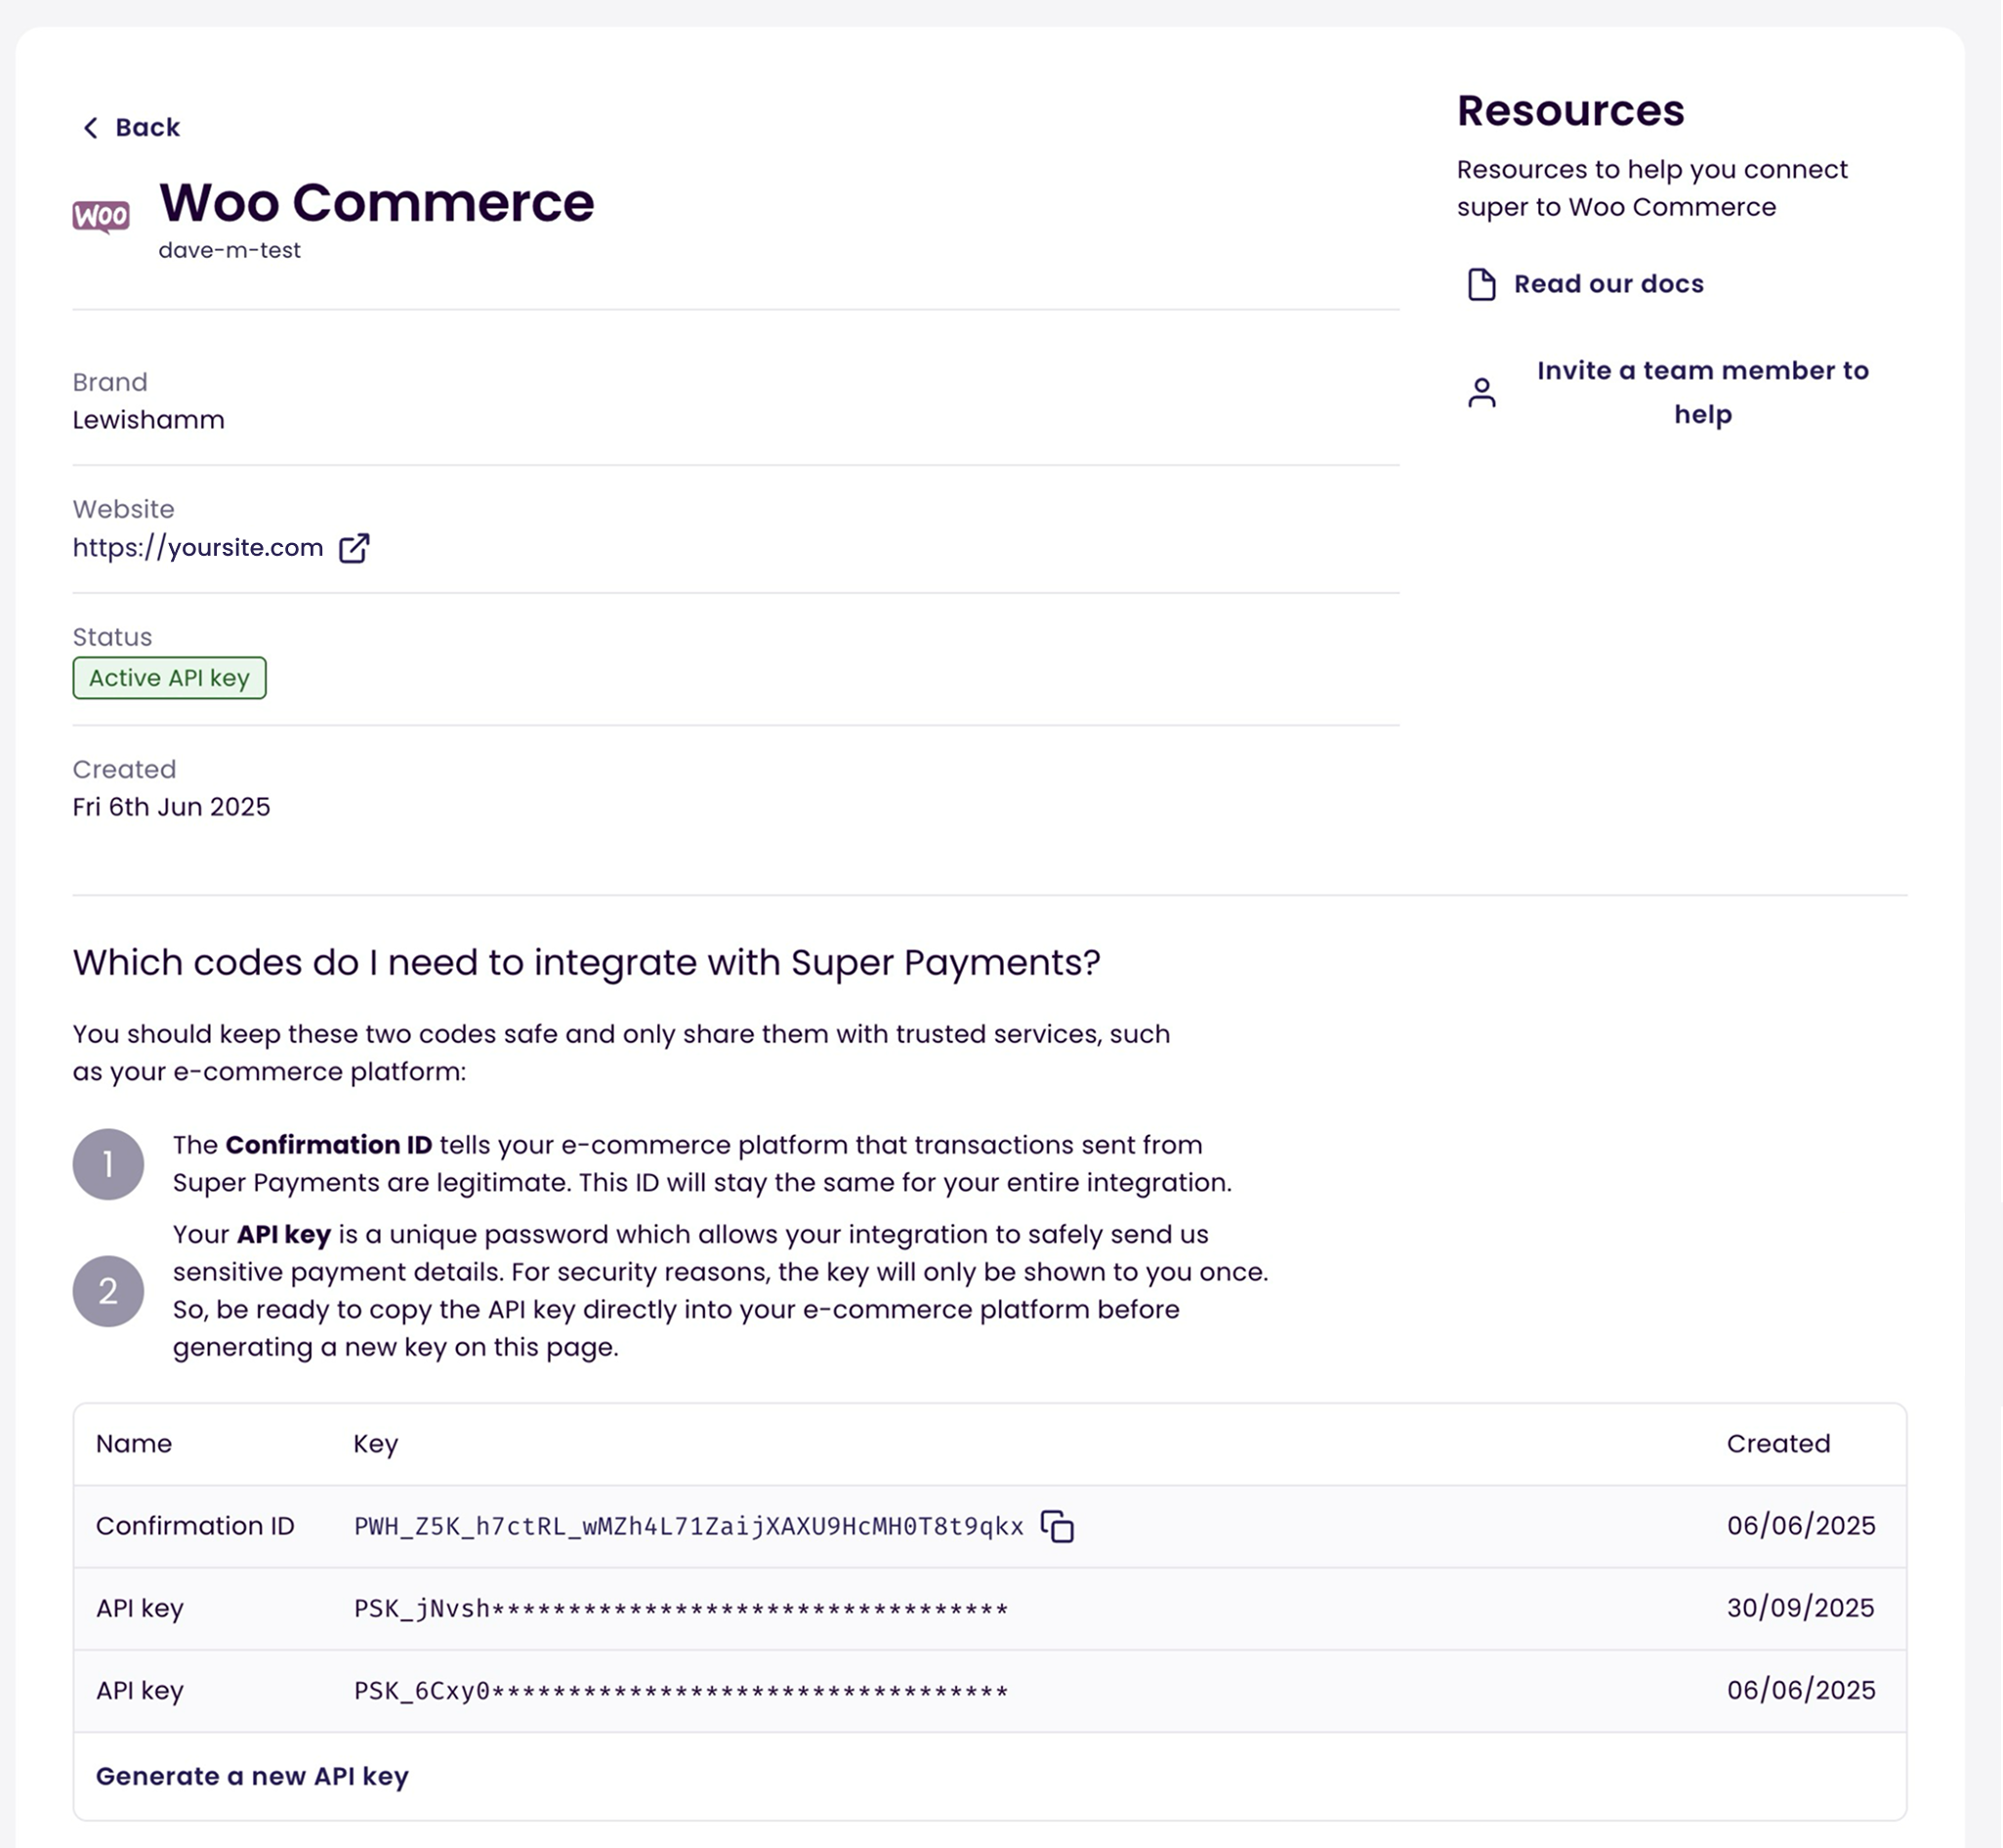
Website URLIf you change your website URL from a testing URL to a live production URL, don't forget to update your integration in the Business Portal or your live calls will fail.
4. Install the Super Payments WooCommerce Plugin
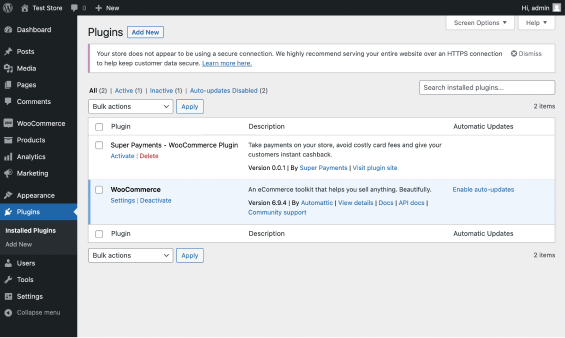
- Sign in to your WordPress site
- Head to the plugin Marketplace via Plugins -> Add New
- Search for “Super Payments”
- Install the Super Payments Plugin
- Choose Plugins -> Installed
- Activate the Super Payments Plugin
5. Configure the Super Payments Plugin
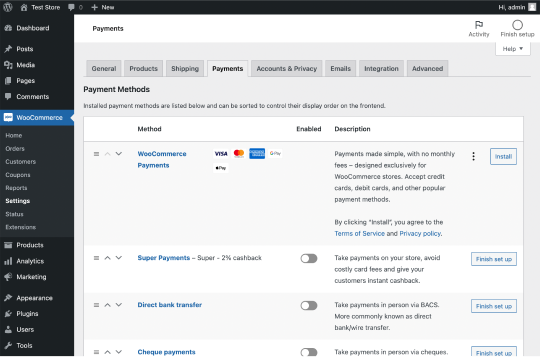
- Choose WooCommerce > Settings > Payments
- Select "Finish set up" on the Super Payments payment method
- Open the plugin settings
- Copy your Confirmation ID for your Business Portal into the Confirmation ID field
- Copy your API key for your Business Portal into the API key field
- Save your changes
6. Activate the Super Payments Plugin
- Choose WooCommerce > Settings > Payments
- Enable the Super Payments payment method
- That's it! Super Payments is now an extra payment method available to your customers 🎉
7. Enable the Super Payments Marketing Assets
Using Super as a checkout method will ensure that shoppers will have a better shopping experience, increasing the likelihood that they’ll purchase from your store, increase their average order value and come back again.
Until shoppers reach your checkout, they’re not aware of the benefits that Super can provide. Letting them know early on in their shopping journey that Super is available as a checkout option through checkout messaging will help their purchase decision, knowing that they’ll get a cash reward for your store when they pay with Super Payments.
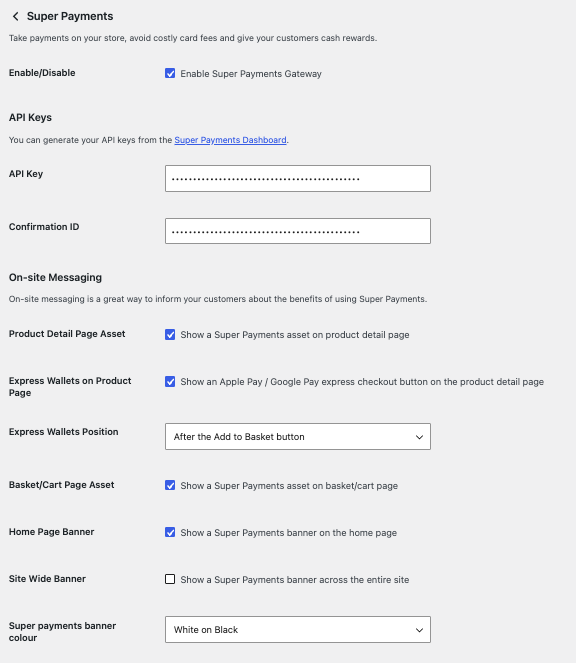
All the Marketing Assets can be enabled or disabled in the WooCommerce Plugin settings.
We're here to helpAny queries about the best way to add Super Payments to your store checkout?
Contact us at any time: [email protected].
Plugin Settings
All settings live in WooCommerce → Settings → Payments → Super Payments. Select Save changes after editing.
General
On-site Messaging
Messaging tells customers about Super's benefits before they reach checkout.
Extra Configuration
Choosing how failed orders are handledCancel the order is recommended. A retry then produces a fresh order and the customer never sees the WooCommerce "bank declined" notice.
Mark failed payments as Failed, cancellations as Cancelled is more granular for reporting, but it uses an auto-refresh on the order received page to avoid that notice during the webhook race window.
Updating the Plugin
Latest version 1.43.1
- Download the latest plugin .zip from here
- Go to Plugins → Add New → Upload Plugin
- Select the downloaded .zip and click Install Now
- When prompted "This plugin is already installed." click Replace current with uploaded
- Click Activate Plugin
Wallet Payment Methods
Super Payments supports Apple Pay and Google Pay express checkout directly on your WooCommerce store. Enabling digital wallets requires a single step: verifying your domain in the Business Portal.
Domain Verification
Before initialising the wallets, you must verify your website domain in the Business Portal.
-
Log in to the Business Portal, select Developers in the sidebar and open the Domains tab.
-
Locate the brand you want to configure and select Show.
-
Apple Pay only - select Download domain association file and host the file on your website at:
https://yourdomain.com/.well-known/apple-developer-merchantid-domain-association⚠️ CRITICAL DEPLOYMENT NOTES:
- Content-Type header: Your web server must serve this file with Content-Type: text/plain - no charset suffix (i.e. text/plain; charset=utf-8 will fail). If you're unsure, check using curl -I https://yourdomain.com/.well-known/apple-developer-merchantid-domain-association and look for the content-type line.
- Binary transfer: Upload this file using Binary mode in your SFTP/FTP client (e.g., FileZilla, Cyberduck). ASCII mode will corrupt the file structure and cause Apple's validation to fail.
-
Select Add payment method domain, enter the full URL of the website where wallets will be hosted, and save your changes.
-
Select the three-dot menu next to your domain, select Verify, and wait for the Apple Pay and Google Pay columns to show as Verified.
Frequently Asked Questions
Why am I getting the message “WooCommerce Data Update Required”?
I found a bug, what do I do?
Help! I’d like some support with getting Super running on my website.
Updated 3 days ago