A seamless integration to Super Instant Payments.
5 simple steps to add Super Payments to your e-commerce store.
Getting StartedTake a look at the Overview before you start. Here you'll get familiar with the API call sequence, authentication, and how you'll know a customer has made payment using Super Payments via a webhook you'll need to provide.
Any queries about the best way to implement Super to your store's checkout? Contact us at any time: [email protected].
1. Create your Super Payments business account
Sign up for your Super Payments Business Account.
2. Add your e-commerce storefront details
2.1 Implement your payments callback url
You will need to implement a webhook for Super Payments before you can complete your setup. This webhook is called by the Super Payments gateway to inform you of payment status, prior to our payments frontend redirecting the customer back to the given return url.
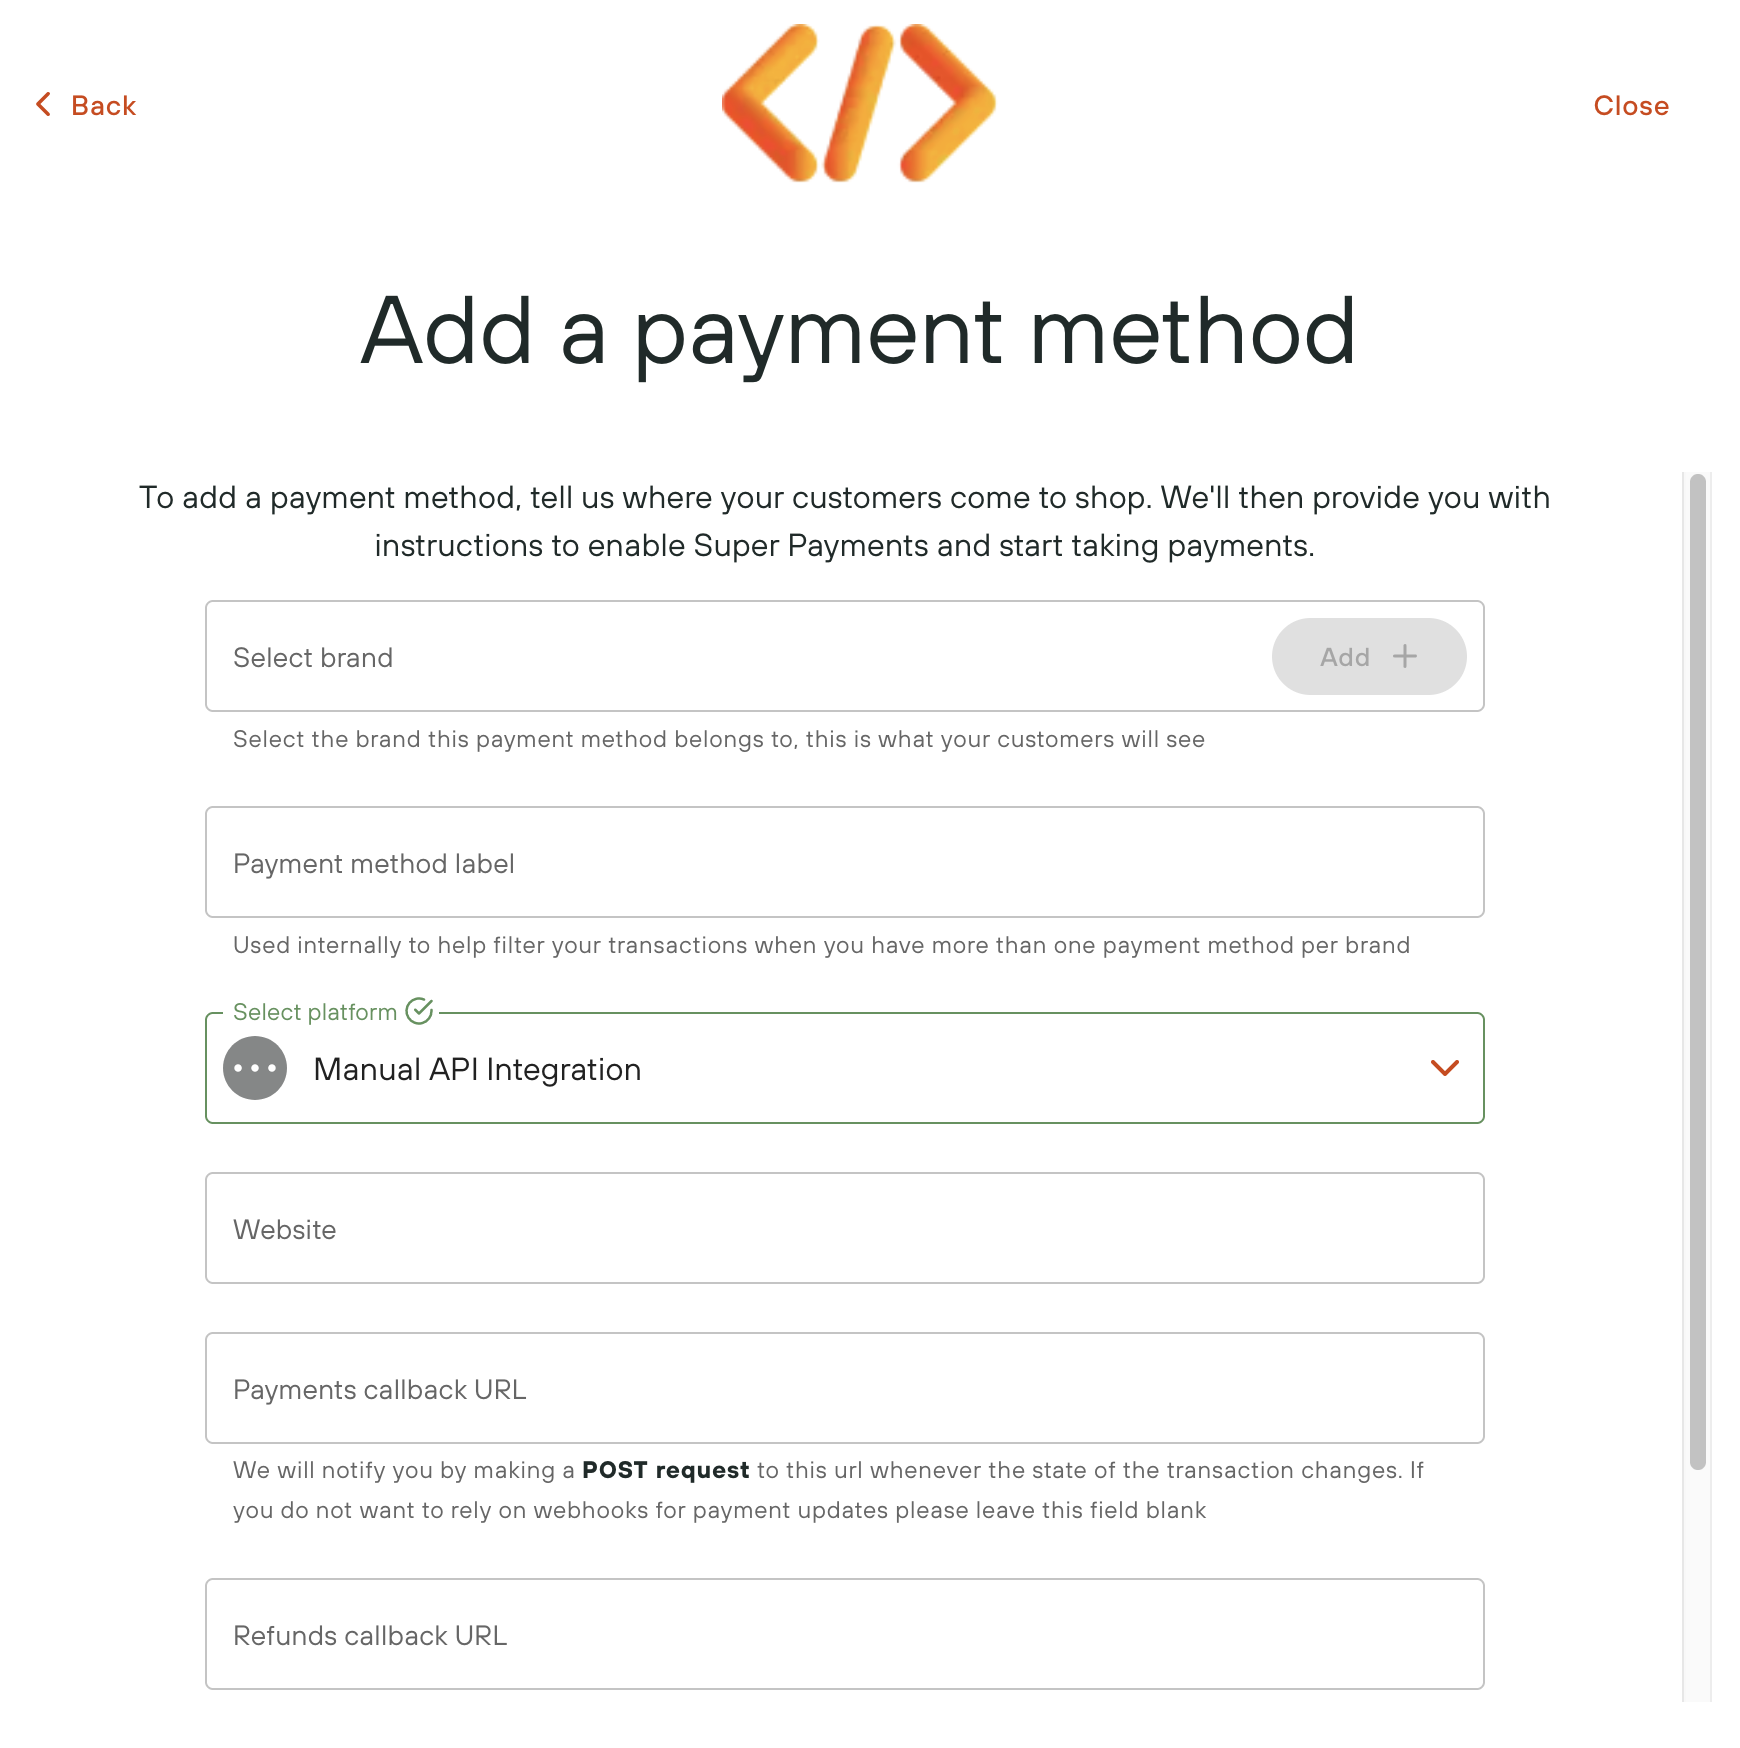
2.2 Set your store and payment callback urls
Once you are signed up and you've got your Super Payments payment callback url live, add your e-commerce store url, payment callback url to your business portal.
You'll set your refunds callback url later when you're integrating with the Refunds API.

Manual API Integration
2.3 Generate your API keys
You'll need to be authenticated for every request you make to the Super Payments API.
You'll find details for Super Payments authentication here.
Website URLIf you change your website URL from a testing URL to a live production URL, don't forget to regenerate your API Keys or your live calls will fail.
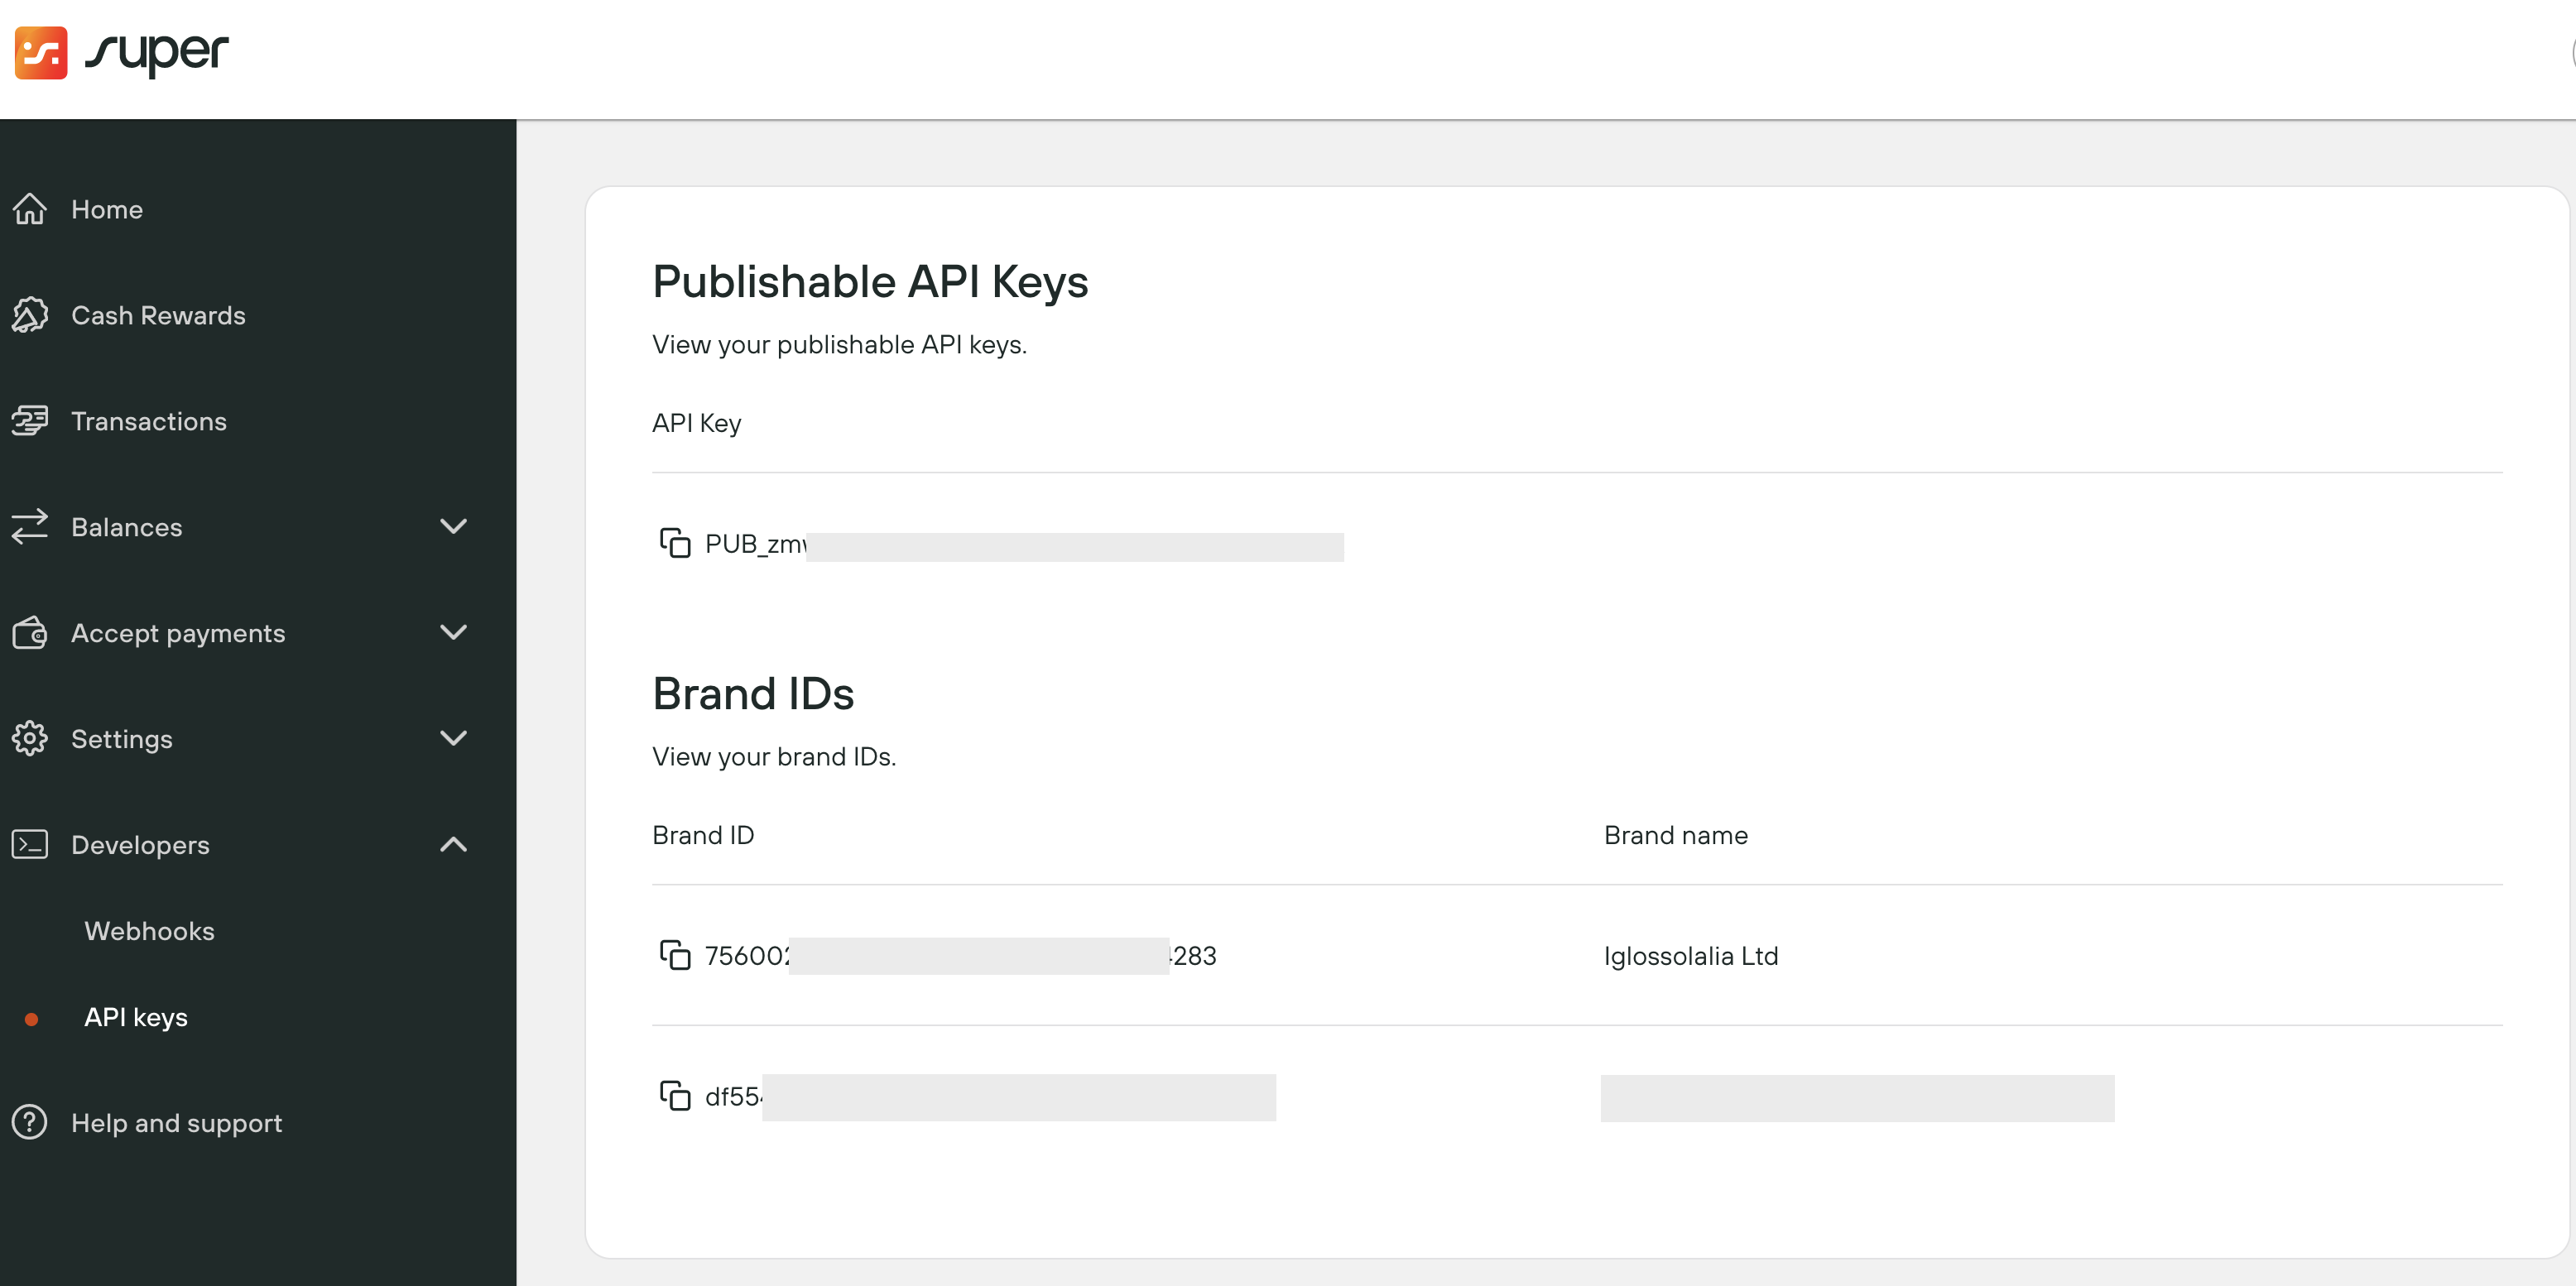
2.4 Capture Brand ID
A brand must be specified when interacting with the payments, refunds and rewards API's.
To retrieve the correct brand ID, visit the Developers, API keys section on the business portal.

Viewing brand ID's
3. Add Super Payments to your e-commerce store
3.1 Generate a reward calculation
The first step is to call generate reward calculation to calculate and display the reward to your customers based on their current basket value.
This generates a rewardCalculationId you'll need to initiate a payment.
Code snippetPlease treat the following code snippets as illustrative examples rather than working code.
curl --request POST \
     --url https://api.superpayments.com/2024-02-01/reward-calculations \
     --header 'Authorization: <<apiKey>>' \
     --header 'accept: application/json' \
     --header 'content-type: application/json' \
     --data '{
       "amount":91234,
       "brandId": "<<brandId>>",
       "currency":"GBP"
     }'
'
'
3.2 Initiate a payment
Once you have received a rewardCalculationId from the generate reward calculation, you should initiate a payment request.
This generates a transactionId and redirectUrl you'll use to take payment from your customer.
Code snippetPlease treat the following code snippets as illustrative examples rather than working code.
curl --request POST \
     --url https://api.superpayments.com/2024-02-01/payments \
     --header 'Authorization: <<apiKey>>' \
     --header 'accept: application/json' \
     --header 'content-type: application/json'
     --data '{
       "brandId":"<<brandId>>",
       "amount":91234,
       "rewardCalculationId":"<<rewardCalculationId>>",
       "currency":"GBP",
       "successUrl": "https://www.yourwebsite.com/success.html",
       "cancelUrl": "https://www.yourwebsite.com/cancel.html",
       "failureUrl": "https://www.yourwebsite.com/fail.html"
     }'
On a successfully created transaction you should redirect your Customer on the provided redirectUrl link from the response above.
3.3 Handle Payment Notifications
At this point the customer will be on our checkout page and will be asked to authorize the payment with their bank.
We will make a POST request to the payment callback url specified in your Payment Method Configuration whenever there is an update to the payment state (e.g. on PaymentSuccess or PaymentFailed).
You should update the state of your order based on this request
An example of the POST content is below:
{
    "eventType": "PaymentStatus",
    "transactionId": "b1445dfc-adc2-4292-bf14-3a5975cf1111",
    "transactionReference": "CKR6D907A240000000",
    "transactionStatus": "PaymentSuccess",
    "transactionAmount": 10000,
    "externalReference": "order101"
}
3.4 Add Super to you storefront
There's lots more you should do to introduce more Super Payments content to your site.
Take a look at Super on your storefront for examples of what it could look like in different parts of your site.
4. Perform a test transaction
All you need to do now is to make sure everything is working as expected. We can provide a sandbox account for your business, just Contact us [email protected].
Simply add a product to your basket and checkout on both desktop and mobile and you'll experience the same seamless payments journey your customers will use to make payment on your e-commerce store.
5. View transaction in the business portal
You will be see any test transactions in your [business portal] (https://business.superpayments.com/dashboard/transactions).
You are live and ready to start accepting Free Payments Forever using Super Payments.
Help and SupportContact us at any time: [email protected].
